
I'm writing this technical publishing process for both myself and other Joomla bloggers who want to elevate the quality of their technical blogging. It's the checklist of activities I follow each time I post and publish a new article in Joomla, and it is my reference guide to ensure I don't forget any tasks during the process. While this will also benefit people who use systems other than Joomla, the instructions specifically focus on my preferred CMS.
And. Here. We. Go.
Starting A New Article
By the time I'm publishing an article, I've got it mostly finished in Evernote using my writing process, so the publishing process is mostly geared towards preparing the page for going live and making it search engine-friendly. To get started, I'll create a new article in Joomla and copy/paste the headline and article content I've created in Evernote.
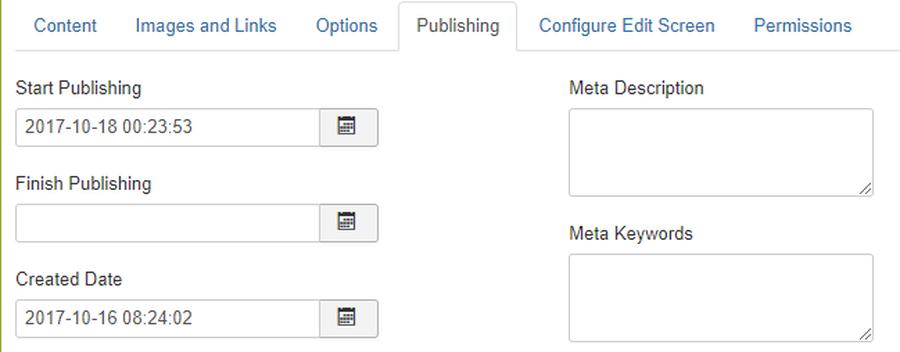
Setting A Publish Date, Category, & Tag(s)
I'm usually adding a new article early, so the first thing I do to prevent myself from accidentally publishing the blog now is to set the publish and create date under the publishing tab. If I don't yet know when I'm going to publish it, I'll instead mark the status from published to unpublished on the main content tab. While there, I'll also set my category and mark any relevant tags for the article.

Header Title & URL
While I've usually come up with a headline in Evernote, I'll now look at it to figure out ways to make it better. In many cases, I'll run it through the Headline Analyzer to elevate the quality and compelling factor of the title. For the URL, I'll plug in the important keywords and remove the short ones like the, a, for, this, etc...
I want the URL as short as possible and as keyword-rich as appropriate. No fluffy words belong in the URL.
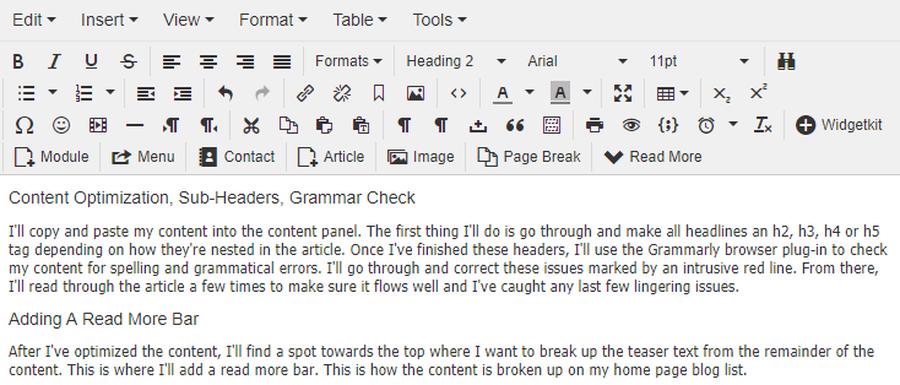
Content Optimization, Sub-Headers, Grammar Check
Adding A Read More Bar
After I've optimized the content, I'll find a spot towards the top where I want to break up the teaser text from the remainder of the content.
This is where I'll add a read more bar. This is how the content is broken up on my home page blog list.
To add it in Joomla 5, click where you want the bar. Then, click CMS Content in the toolbar, and click Read More.

Featured & Articles Images With Relevant File Names & Alt Tags
From here, I'll go through the blog post and determine how many images I want and how I'll distribute them throughout. On every blog post, I add an intro and a full article image. I'll add these images under the Images and Links tab in the Joomla article editor.
With the template on my website, the intro image is what shows on the index page, and the full article image is what shows at the top of the page, above my blog post headline. Often, I will use one image as the intro image and a different image as the main banner. If they are the same, you can simply copy and paste the image of the intro into the other or set up your template to detect and override.
I'll also add an alt text description for the image. Many times, I'll just copy and paste the title into this field for the featured image.
If I want to add additional photos throughout the pieces, I simply add them in on the content tab with the article copy using the Joomla included TinyMCE WYSIWYG editor. For each image, I'll make sure to tag it with an image description (alt text).
I use images primarily from Unsplash. You can also explore other free image repositories in the Path Of The Freelancer toolbox. Make sure to select images to easily view these image resource centers.
When I download these images, I name them in a way that is both descriptive of the image while also injecting key phrases relevant to the article's content. Both the image name and the alt text tags are important for search engine optimization.
Setting Up Internal Links & Opening External Links In New Windows
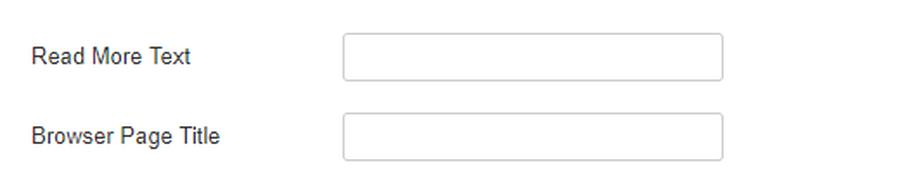
Adding Meta Content, An Alternate Title, & Read More Text
In addition to these two search engine improvements, I'll also set a meta description. Meta descriptions are worth doing because they are often used as the text for our search engine results. I'll often plug my article into Google Gemini or ChatGPT and ask it to write me a meta description. You can also use the first few lines.
Post Publish Quality Assurance + Testing New Links
With everything set, I'll save the article and mark the status as published. If the scheduled date is in the future, it will go live on that date. If not, the blog goes live now!
If the blog is scheduled for later, I'll log in to the front-end of my Joomla website and view the blog as it would look when it is published. If there are any issues, I'll correct them. I'll also test all the links and make sure they are working as expected.
Distributing My Blog Across Social Media
Once all systems are a go, I'll use Smarter Queue to share the post across my social media channels. You can automate this process with an RSS feed, or you can do it manually.
It will then automatically go out to my email list on Sunday mornings, via Mailchimp's RSS feed email campaign.
If you want to distribute your blog post further, I recommend waiting two weeks, and then you can post to the following places.
- LinkedIn (as an article or Newsletter)
- Medium
- Substack
- Quora
At the bottom of the article in these other places, include a note that says something like, This was originally posted on xyz website here. And include a link to the original.
The reason we want to wait and include this link is that we want Google to index the blog on our website first, so that it becomes the primary place for that piece of content, and when Google indexes the article, it indexes our website blog post, and not the blog post in other places.
The benefit of distributing your content is that it puts it in front of more people, and you also get links back to your website, which helps build your authority in the eyes of Google.
Once you've distributed the article, we're ready to start the process all over again for the next blog post.
The List, Simply Listed
Here is a simple list of everything I've described above for quick future reference. Create a bookmark to this list using this URL.
- Create a new Joomla article & copy my title and content from Evernote
- Set the create & publish dates
- Select the category and tag the blog
- Improve the title headline
- Simplify the URL
- Make all headlines in the article a header tag (H2, H3, H4, or H5)
- Correct all Grammar issues with Grammarly
- Read through the content and make tweaks to make it better
- Add a read-more bar
- Find featured and articles images, save with a keyword rich filename and sized to the width of my blog
- Upload my photos, add them to the blog, and add alt description tags to all images
- Set up internal links throughout the post
- Make all external links open in a new window
- Set the read-more anchor text (if you're template uses it)
- Create a browser page title variation
- Add a meta description
- Schedule or publish the article to go live
- Read and refine again
- Using Smarter Queue, schedule to distribute the blog post on social media
- Distribute to other article publishing platforms.
Photo by Byron Sterk on Unsplash
Related Content


